So, which type of kitchen faucet do you have? A single or a double-handled faucet? Is that dripping? In case you have no time to check out a new kitchen faucet it is time to fix that dripping kitchen faucet. How? Well, here’s your manual to do it all alone. Start off!!
How to Fix a Dripping Kitchen Faucet?
Locate the leakage
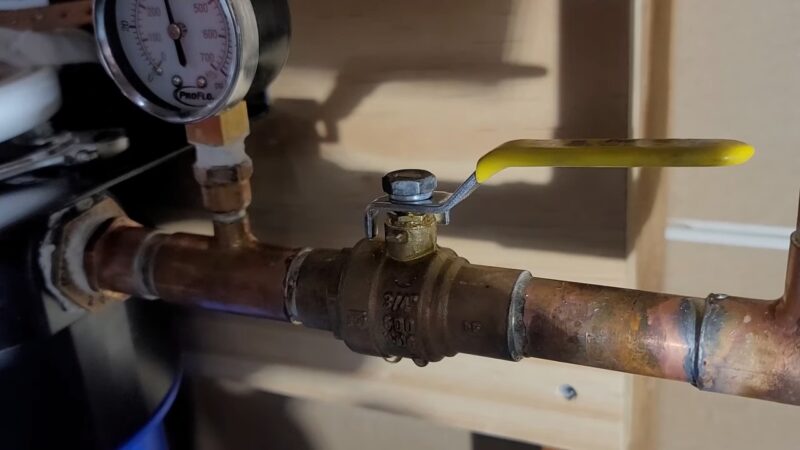
To check this out, one needs to shut down their water supply valves one at a time. This shows which side of the faucet is leaking. If it cannot be deciphered in this way, then shut down the main water line. Generally, shutting off of one valve helps but in certain cases you have to replace both sides hardware to ensure whether it is the hot or cold water side that is leaking.
Disassemble the old kitchen faucet
Step 1: In this case, one must switch ‘on’ the faucet to release excess water. After accomplishing this, the drain needs to be shut down, and open surface of the sink covered to prevent any wetness.
Step 2: Now one has to remove this aerator for inspecting the damage level. In case it is stuck, rinse a towel in vinegar for loosening its materials. After some time, it will normalize.
Step 3: After you disassemble the old parts, do lay it for any further usage (in an emergency).
There are certain types of faucets mentioned here which you can try out to fix the dripping faucet of your kitchen.
Ceramic disc faucets:
In this type, there is a cylinder with tiny discs placed in the bottom that helps to manage water flow.
Here both the handle and screw have to be removed, and a new cylinder needs to be set. After that, the water supply can be started off.
Compression and Reverse compression faucets:
Here the O ring and washer have to be replaced in its valve system. While replacing it add some plumber’s grease to this for a better hold.
Cartridge faucet
For this set, the screw has to be removed by the retaining nut or clip and then its cartridge has to be done away with.
Aerator
If your aerator is old, then dip it in white vinegar to remove minerals. If it’s a new one, then make sure to run water to clear the debris.
How to repair a single-handled dripping kitchen faucet?
Locate the leakage
In this case, there can be 2 conditions.
- If the spout is leaking, then it’s a case of internal damage.
- If it is the base leaking, then the damage is around the sealing of the faucet
Disassemble the old kitchen faucet
Step 1: Here one has to shut off all valves at the same time. After that, ensure that the main water supply is also turned off.
Step 2: The faucet must be turned ‘on’ and relieve the pressure that is there on it. Then the drain has to be closed for protecting its parts.
Step 3: Finally, the aerator has to be removed and dipped in white vinegar. One can also tie up a rubber band and remove it after some time by using pliers.
Replace the Ball valve
Generally, a wrench is enough to remove a cap followed by its screw. In case of leaky spouts, washer, cam and ball also require a change. O rings also need to checking in case of mineral deposits. Finally turn the ‘on’ position.
Replace the Cartridge
One has to check the screw, clip, retainer nut, and trim ring in this case.
Replace the Ceramic Disc
For this, one must change their old cylinder with a new one. Only after that can that tap be turned ‘on’.
Checking the water supply and working of the Aerator
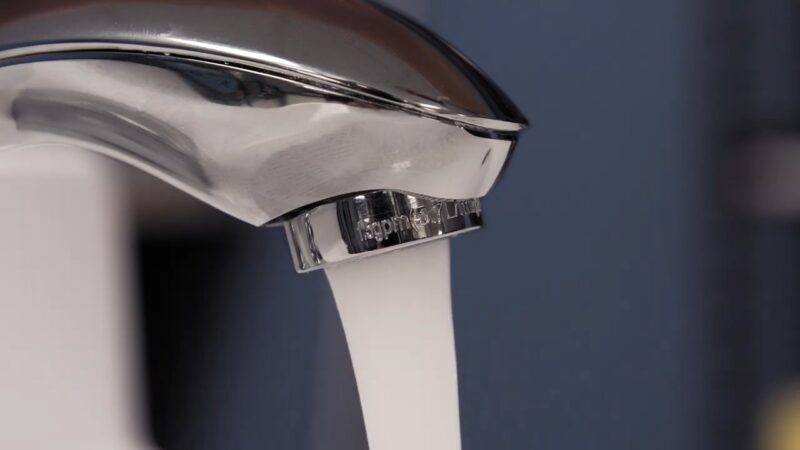
This is the final step, and one must turn on the water valves with minimal force. Only after a certain point in time, increase the speed of this water flow and check whether the aerator can handle it. Once all of that debris gets cleared, water flow will normalize in some time.
Do make it a point to check in both cases that post-installation the water flow is maximum, and there is no leakage condition.
All set? Hope you use it well till you again have a dripping kitchen faucet.
Here, you can check some suitable kitchen faucets for your kitchen.
If you are facing some other faucet problems, we highly suggest you read our article on How to deal with common kitchen faucet problems?
FAQ
How do I disassemble an old kitchen faucet?
The process of disassembling an old kitchen faucet will vary depending on the faucet type. Generally, you will need to turn off the water supply, release any excess water by turning on the faucet, cover the sink surface, remove the aerator, and then proceed to disassemble the specific components of your faucet following the manufacturer’s instructions or a repair guide.
How do I replace the damaged parts in my kitchen faucet?
The specific steps for replacing damaged parts in your kitchen faucet will depend on the type of faucet you have. For example, with ceramic disc faucets, you will need to remove the handle and screw and replace the cylinder. Compression and reverse compression faucets require replacing the O rings and washers, while cartridge faucets involve removing the cartridge after removing the screw and retaining nut or clip. Refer to the manufacturer’s instructions or a repair guide for detailed instructions based on your faucet type.
How do I ensure proper reassembly of the faucet components?
When reassembling the faucet components, ensure that all parts are properly aligned and tightened according to the manufacturer’s instructions. Use plumber’s grease where necessary for a better seal. It’s important to be cautious and take your time during reassembly to avoid any mistakes or further damage.
How do I test the repaired kitchen faucet for leaks?
Once you have completed the repair and reassembled the faucet, turn on the water supply valves with minimal force. Check for any leaks around the repaired areas. You can also perform a simple test by blocking the drain, filling the sink with water, and then releasing the stopper to check for any leaks or drips.
What should I do if I encounter difficulties or the problem persists after attempting to fix the dripping kitchen faucet?
If you encounter difficulties or the problem persists after attempting the repair, it may be best to consult a professional plumber. They have the expertise and tools to diagnose and fix more complex faucet issues.
Conclusion
Having a dripping kitchen faucet can be frustrating, but fortunately, you can fix it on your own. By following a few simple steps, you can address the issue and restore your faucet to its proper functioning. Whether you have a single-handled or double-handled faucet, the process involves locating the leakage, disassembling the faucet, and replacing the necessary components.